Setup & Foundation
Step 1: Power Grip for Speed and Distance
- All four fingers under the rim: place the finger pads on the bottom of the disc, and rest the thumb on top, slightly forward of center above the index pressure point.
- Small palm gap: leave a thin space between your palm and the flight plate to keep the wrist free and allow clean spin.
- Grip connects power to flight: your hand transfers energy from the body into the disc’s rotation and launch speed.
- Relax early, squeeze late: grip pressure builds smoothly and peaks as the disc rips free; let the disc release itself.
- Clean grip supports an arm path across the chest: a flat, centered pull keeps the disc on line and improves accuracy and power control.
Quick cue: Solid rim hold, free wrist, squeeze late.
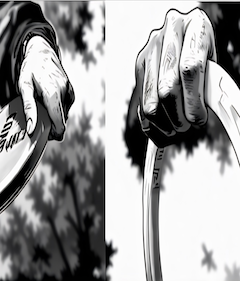
Foundations: finger pads (not palm), thumb position, palm
gap
Closed-hand rip and late pressure timing (starts at 1:20)
Step 2: Athletic Stance and Base
- Balanced foundation: feet shoulder-width apart, knees flexed, weight centered slightly forward of the midfoot for a stable, athletic base.
- Tall chest, relaxed shoulders: upright but loose posture that allows smooth rotation.
- Engage the core early: load into the back leg and feel the hips and abdomen coil before the shoulders move.
- Quiet head and steady posture: keep your eyes level and balance centered as you begin to shift forward.
- Practice feel: from this stance, rotate the legs and hips slightly back and forth to feel stored tension and ground-up power without throwing.
Quick cue: Balanced base, quiet head, core leads.
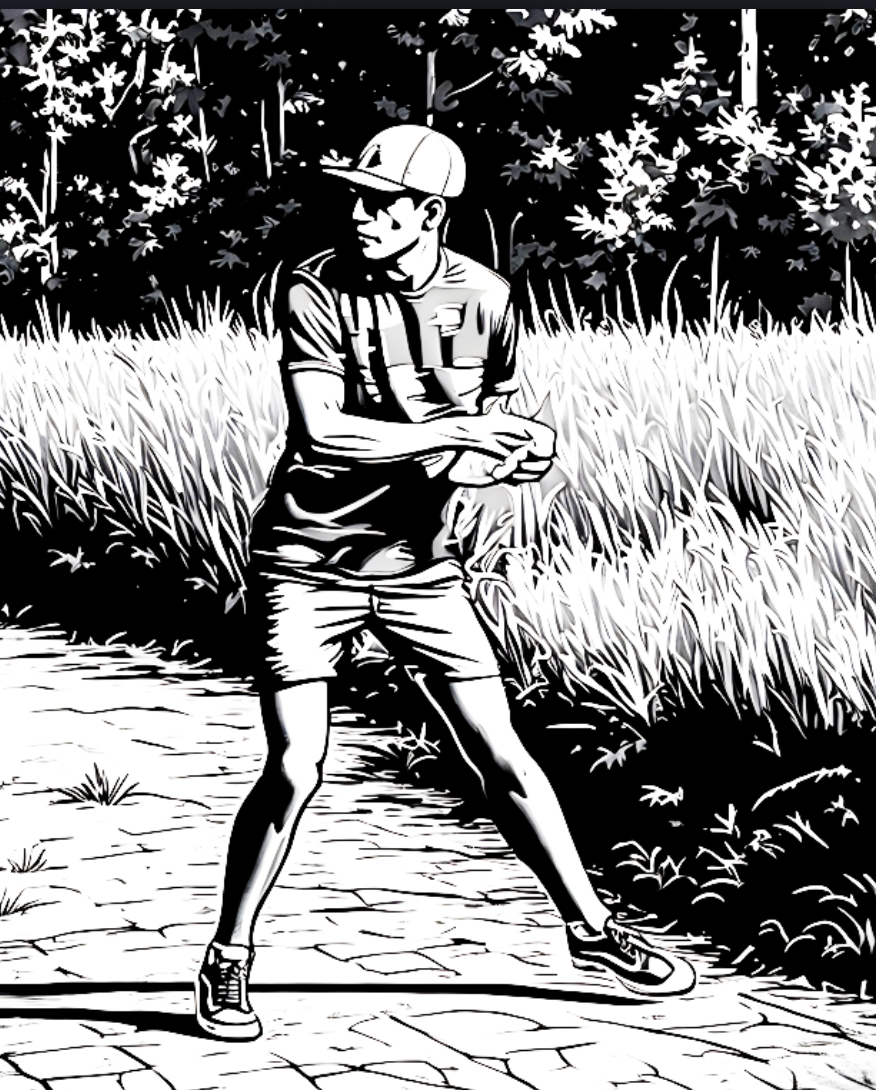
Center balance and posture cues
Lower-body load to build power
Step 3: Staggered Plant — Create Space for Power
- Stagger for space: front foot 30° open, back foot slightly behind and inside to give the hips room.
- Coil into the stagger: turn the shoulders away while the hips stay closed and feel tension build across the core.
- Shift and brace tall: drive weight from the back leg into the plant and stay upright as the front leg catches and transfers energy upward.
- Hips lead, shoulders follow: open the hips first and let the upper body and arm trail for whip speed.
- Practice feel: make a few medium-power standstill throws to connect the coil, shift, and brace.
Quick cue: Stagger strong, coil tight, brace the front leg, drive with the hips.
Plant angle and stance window for clean hip rotation
Leverage into the brace and lower-body power
Step 4: Engage the Core — Power from the Ground Up
- Load the back leg: bend slightly and feel pressure on the ball of the foot while the hips and core begin to coil.
- Coil through the hips: turn the hips and abdomen first, keep the shoulders closed to store tension.
- Unwind from the ground up: release the sequence in order — legs, hips, core, shoulders, arm.
- Stay connected: keep the chest upright and balance centered as power transfers forward.
- Practice feel: make slow-motion swings to sense the hips leading and the core pulling the shoulders through.
Quick cue: Load, coil, unwind, stay centered.
Core-first rotation and sequencing
Lower-body drive into the hit
Motion & Timing
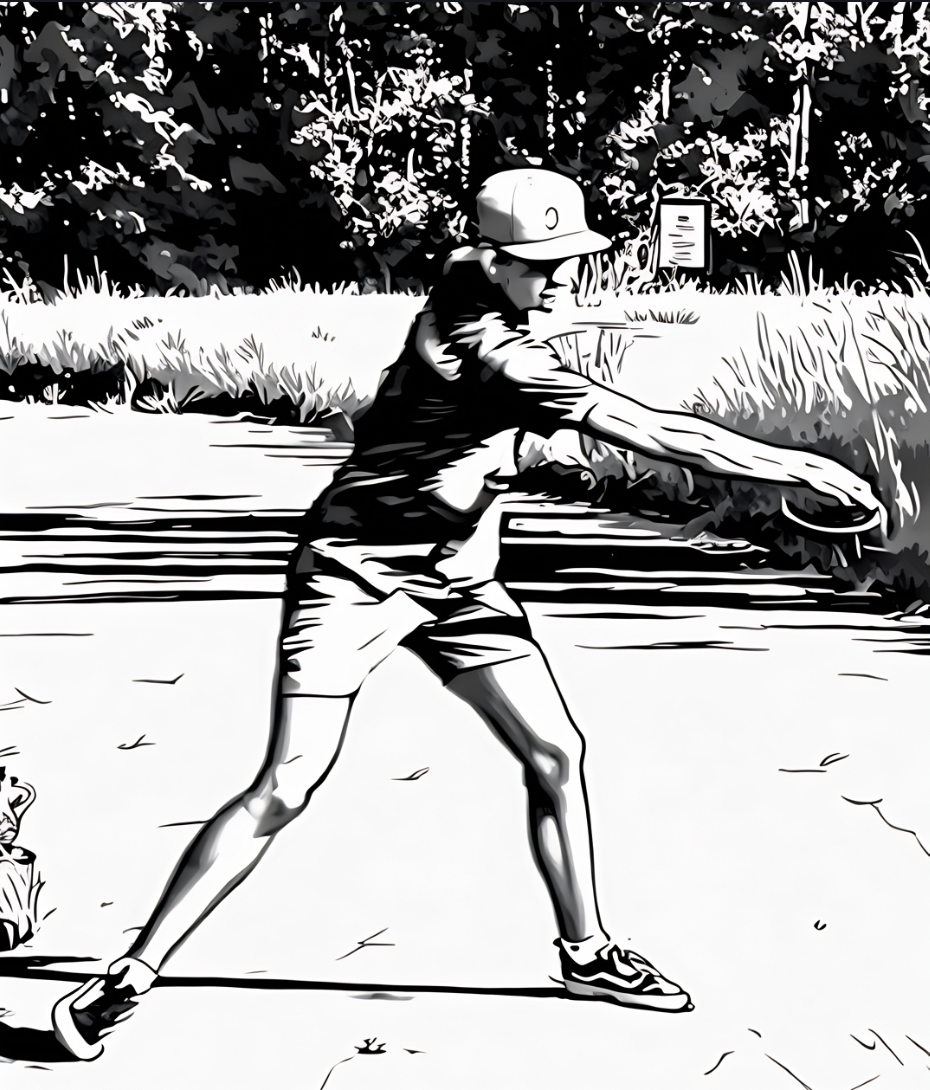
Step 5: Reach-Back & Slingshot Momentum
- Allow natural extension: let the arm extend fully and smoothly as the body turns; don't force or over-extend behind the throwing sline.
- Stage the disc, don't push it back: keep the disc still and let your body move around it into position.
- Level extension: keep the disc on a flat, chest-high plane to stay aligned and avoid rounding.
- Slingshot bounce: at max extension, allow a light forward bounce with no pause—hips lead as the off-arm swings across for balance and torque.
- Whip, don’t push: the body loads and uncoils; the loose arm trails and accelerates like a bullwhip—not a muscled, forced swing using arm-only effort.
- Match extension to desired power: full drives use a longer stride and full extension for maximum distance, while shorter throws use a smaller coil and shorter reach.
Quick cue: Extend smooth, bounce forward, hips lead, arm whips.
Level extension and forward rhythm
Slingshot bounce: no pause, hips lead
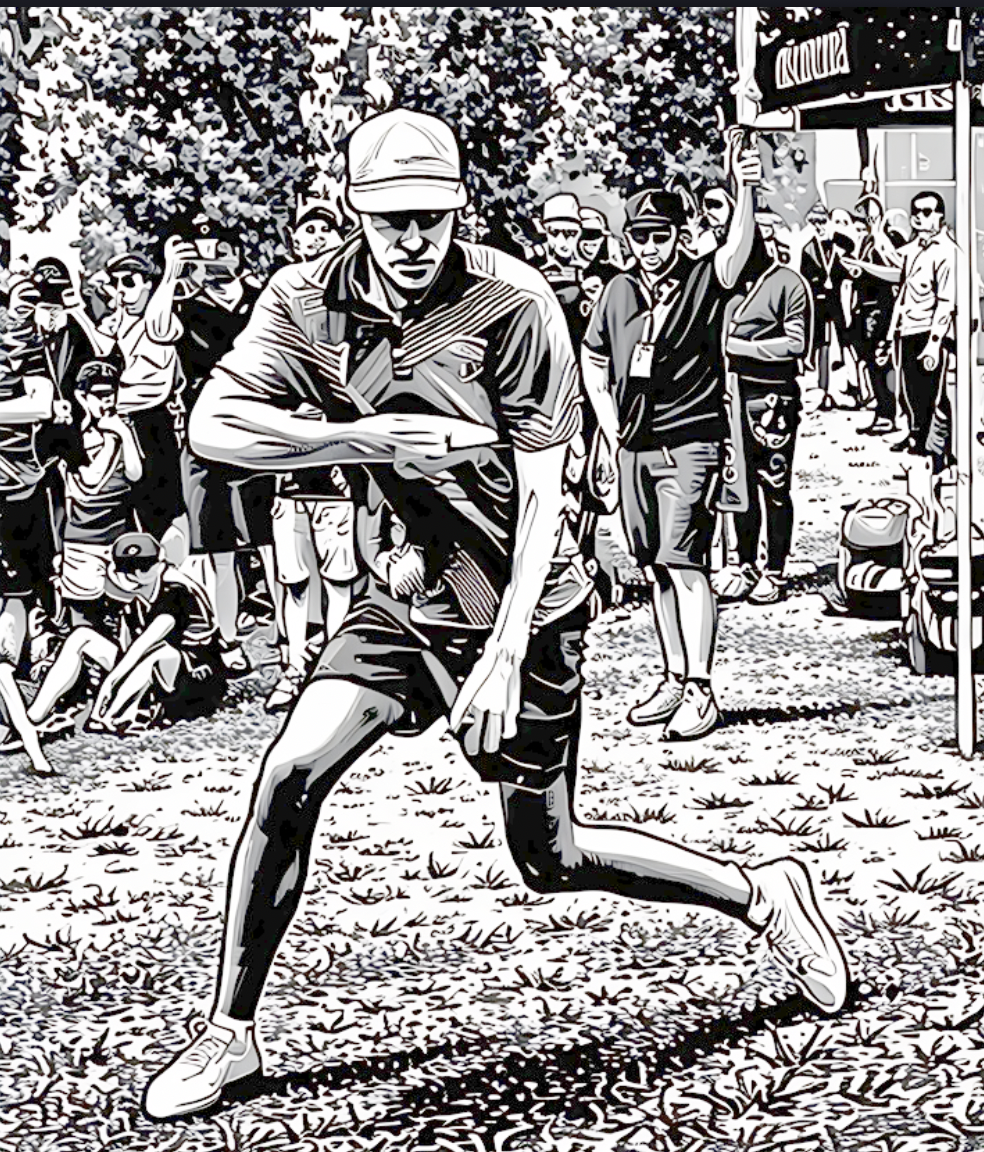
Step 6: X-Step / Center Balance
- X-step sequence (RHBH): step left forward to start rhythm, right foot at a 45° angle to load the hips, left foot crosses behind to form the X, then right foot plants forward about 1.5 to 2 feet left of the center line to set the brace.
- Rhythm over speed: use the X-step to build smooth tempo, not to rush; stay light and balanced.
- Cross smooth: trail leg crosses behind naturally; keep your head steady, shoulders level, and eyes down the line.
- Center your weight: stay stacked over the hips through each stride; do not lean or sway outside your frame.
- Hips load and drive: as the plant lands, feel tension build through the hips and use that stored power to pull the body forward through the throw.
Quick cue: Smooth cross, centered body, brace firm, drive from the hips.
Center balance and posture cues
Coaching cues for balance and timing
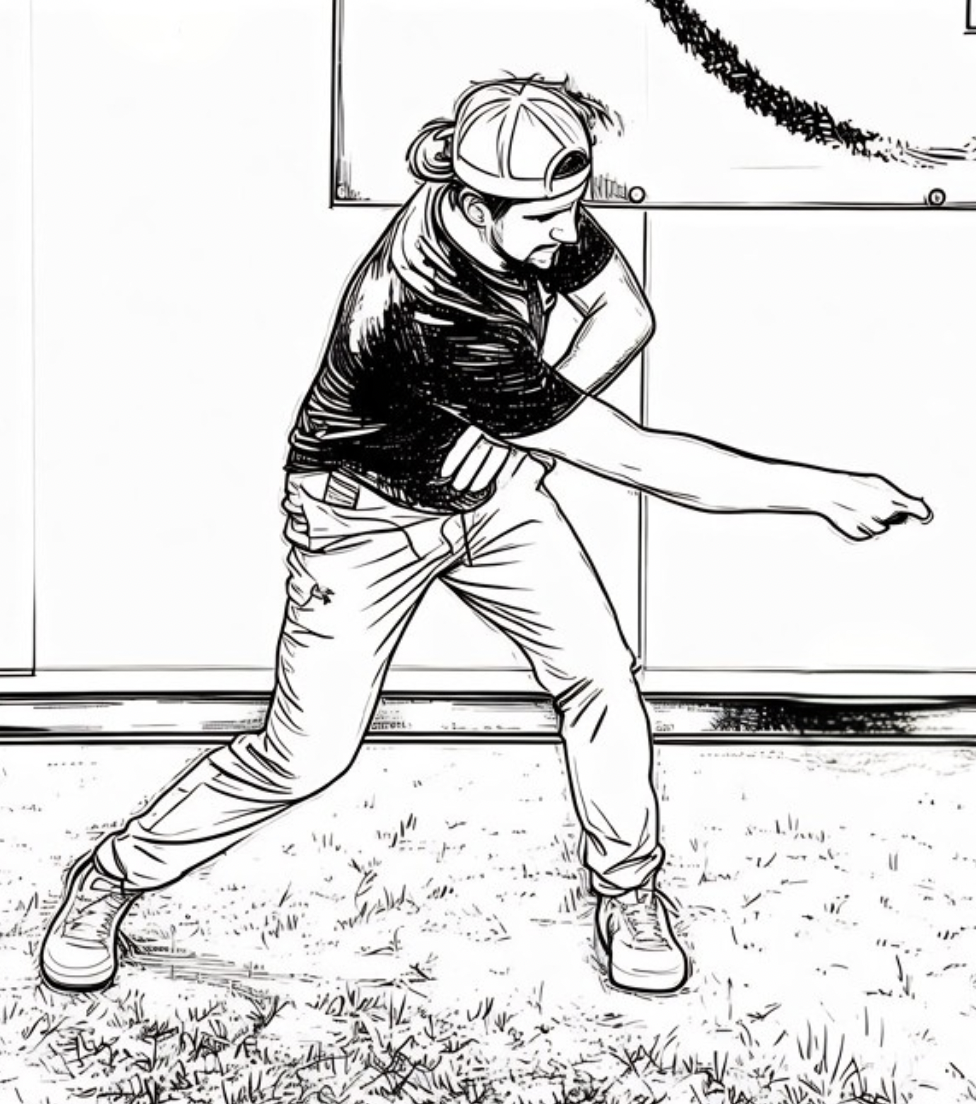
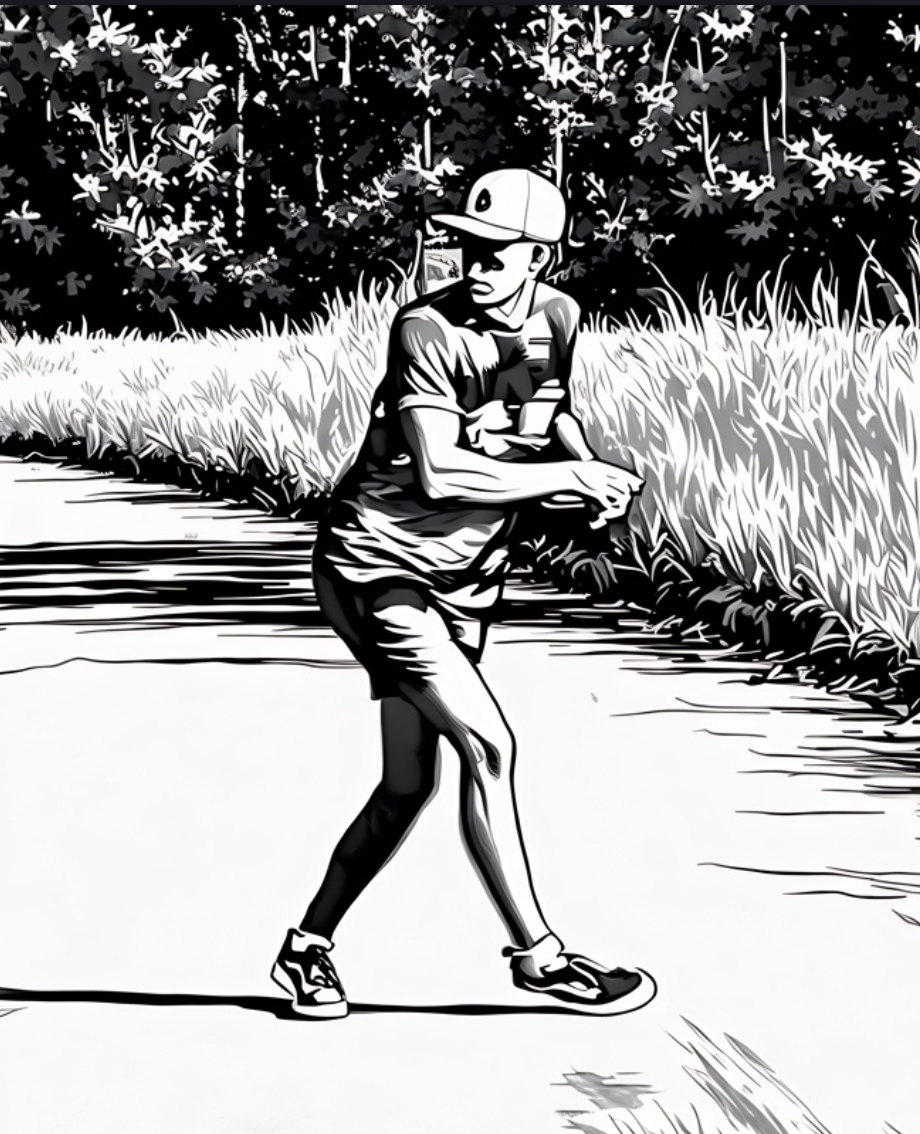
Step 7: Arm Path & Flat Pull — Control the Plane
- Flat pull line: pull the disc straight across the chest at roughly chest height to keep the throw on plane and avoid rounding.
- Elbow leads: drive the elbow forward first, keeping it slightly ahead of the hand to guide the disc through the power pocket.
- Power pocket: as the elbow bends to about 90°, the disc tucks near the right pec (RHBH), creating a compact leverage point before the hit.
- Wrist load for snap: just before the pull, slightly bend the wrist inward toward the forearm to store tension; release it naturally through the hit for more spin and clean snap—don't force or curl too deep.
- Wrist and shoulder alignment: keep the wrist neutral and shoulders level so the disc stays flat through the pull; no wrist roll-up or shoulder dip.
- Relax the arm: let the arm and wrist stay loose and trail behind body rotation; speed builds naturally from the hips and shoulders, not muscle force.
- Follow-through on the same plane: extend fully after release and let the arm continue along the original line for accuracy and smooth finish.
Quick cue: Elbow leads, flat pull, loose arm, clean line.
Flat pull and hinge model for clean arm path
Release timing and arm path alignment
Release & Follow-Through
Step 8: Clean Release — Let It Rip
- Release is the result, not an action. Keep the hand closed; let the disc rip free from finger pressure and speed.
- Disc exits off the inside edge of index/middle fingers. Grip pressure peaks right before the rip, then relaxes. Match grip firmness to throw speed.
- Done right, the end feels like the crack of a whip—fast and effortless.
Feel: Hold until it rips out.
Closed-hand rip and grip scaling
Clean release technique
Step 9: Release Window — Early Is Powerful
- Earlier release equals cleaner flights. For RHBH, aim to release around 10–11 o'clock, not 12–2.
- Early release preserves acceleration and prevents rounding. Disc should pivot out in front, not drag past the shoulder.
- Groove timing with slow standstills and putters/mids.
Cue: Earlier than feels right—trust the line.
10–11 o’clock exit for straighter flights
Hold the flat plane; avoid wrist roll-up
Step 10: Coaching Cues — Posture, Head, Pocket
- Small details drive consistency. Posture: tall, athletic, forward through the brace. Head: eyes quiet; don't chase the disc in reach-back.
- Pocket: elbow forward, disc tight, shoulders level. Plane: arm path chest-high; finish smooth, facing target.
Mantra: Tall. Quiet. Flat. Forward.
Coaching breakdown: posture, head, pocket
Core leads; shoulders follow
Want to put it into practice? Try the One-Step Drill to sync your footwork and timing.